
Quick start: your first document library Free & Pro
Set up your first FileDeck document library in about five minutes: add a few documents, assign categories, and publish a searchable library page.
Updated October 8, 2026
New to FileDeck? FileDeck is a WordPress plugin that turns your files into a searchable document library on your own site. The free plugin on WordPress.org includes instant search, filters, four layouts and download counts, with no limit on documents. FileDeck Pro, from $59 a year for one site, adds search inside PDFs, access control with file protection, and version history. Try the live demo to use a real library before you install anything, or read what FileDeck is.
You can go from a fresh FileDeck install to a working, searchable document library in about five minutes. Add two or three documents, assign categories, and view the auto-created library page — or drop the Document Library block onto any page you like.
This guide assumes FileDeck is already installed and activated.
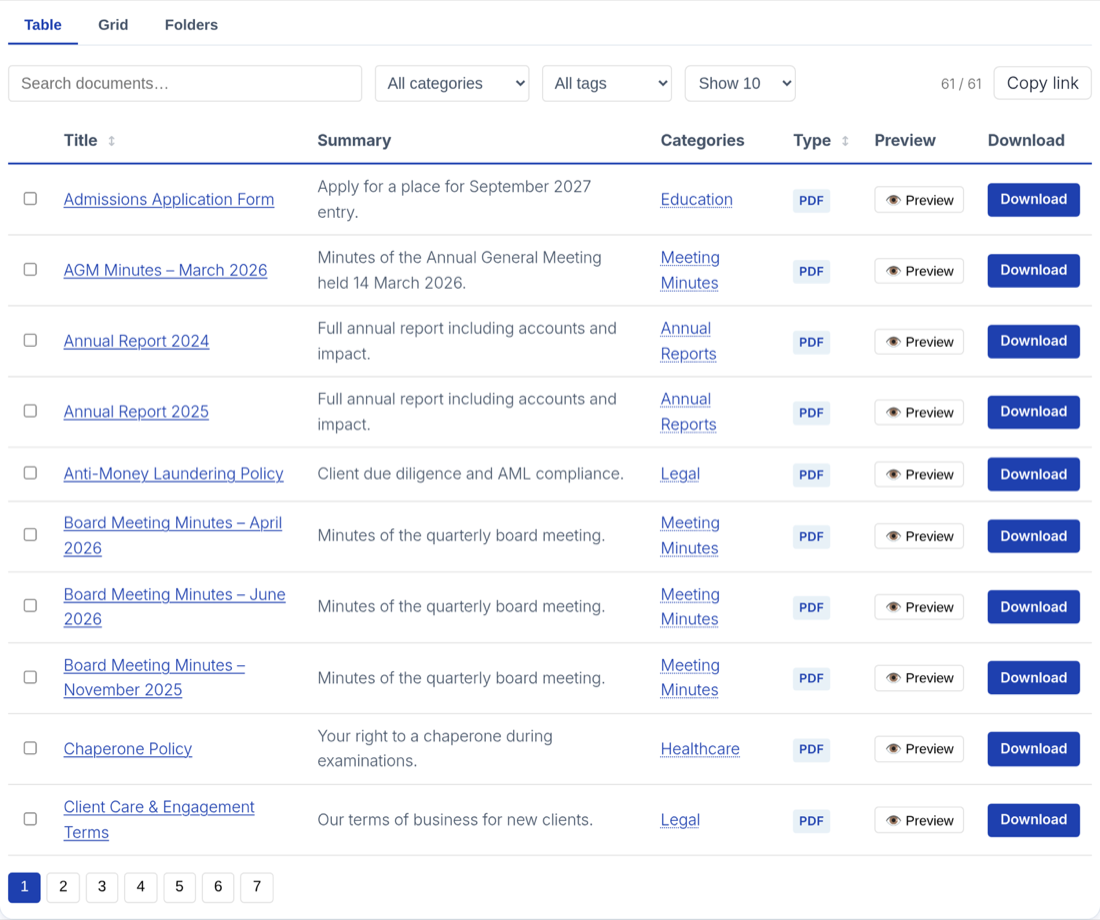
Step 1: add a few documents
- Go to Documents → Add New Document in wp-admin.
- Enter a title (for example, "Enrollment Form 2026").
- Drag and drop the file onto the document, or choose one from the Media Library. FileDeck captures the file size, type, and filename automatically.
- Optionally add a short description and a featured image (used by the grid layout).
- Click Publish.
Repeat for two or three files so the library has something to show.
Step 2: assign categories
Categories power the category filter and the folders layout, so it is worth adding them now.
- On the document edit screen, tick or add a category (for example, "Forms" or "Policies") in the category panel.
- To manage categories in one place, go to Documents → Document Categories. Categories are hierarchical, so you can nest them.
You can also add tags under Documents → Document Tags for a second, non-hierarchical way to filter.
Step 3: view your library
FileDeck created a "Document Library" page, titled in your site’s language, when you activated it. Open Pages, find that page, and click View. Your published documents are already there, with search-as-you-type, sortable columns, and category and tag filters.
Step 4 (optional): put a library on any other page
- Edit any page and add the Document Library block. You get a preview in the editor and a layout picker; Open the library builder sets columns, categories, filters and the rest with a live preview in your theme. Or start from Documents → Library builder, which can create the page for you.
- Prefer the classic editor or a non-block context? Use the shortcode instead:
[filedeck layout="table" columns="title,excerpt,categories,date,size,type,link" per_page="10" sort_by="title"]
Step 5: pick a layout
Choose table, grid, or folders in the block settings or the shortcode’s layout attribute. Table suits detailed lists, grid suits visual collections, and folders groups documents into collapsible categories.
That is the whole setup: a live, searchable library your visitors can use right now. To adjust the layout, columns, and accent color, head to Documents → Settings, or re-visit the choices from the setup wizard.
FAQ
What file types can I add as documents?
Any file your WordPress Media Library accepts — PDFs, Office documents, images, spreadsheets, zips, and more.
How do I show only one category on a page?
Scope the block to a category in its settings, or add category="your-slug" to the shortcode.
How do I change the layout later?
Edit the block and pick a different layout, or change the layout attribute in the shortcode. Nothing about your documents changes.
Still stuck? Email support@getfiledeck.com.